
Specialist Advice for Builders and DIY Deck Installers
How to Install Composite Decking: A Step-by-Step Guide for Australian Builders and DIYers
Composite decking has become the material of choice for Australian homeowners and builders. No oiling, no sanding, no warping, and a finish that holds up in even the harshest coastal conditions. But getting the best result from composite boards depends entirely on correct installation. Get the subframe spacing wrong, skip the joist protection tape, or ignore expansion gaps, and you will end up with a deck that squeaks, flexes, or buckles regardless of how good the boards are.
This guide covers the full installation process from planning through to the final cut, based on best practice for composite decking in Australian conditions.

Before You Start: Planning and Preparation
Calculate your materials first
Before ordering a single board, use the My Deck Deck Planner to calculate exactly how many boards and fixings you need based on your deck dimensions. Ordering short causes delays. Over-ordering wastes budget. Getting it right from the start saves time and money.
Check council requirements
In Queensland, decks above a certain height or area require a building permit or development approval. Contact your local council before starting construction to confirm what approvals are needed. Installing without a required permit can result in fines and mandatory removal. This step is the responsibility of the homeowner or builder, not the supplier.
Acclimate your boards
Allow your composite boards to sit on site for at least 24 to 48 hours before installation. This allows the boards to adjust to the ambient temperature, which matters in Queensland where surface temperatures on an exposed deck can reach 60 degrees Celsius on a summer day. Boards installed cold and then exposed to full sun will expand more than expected if no acclimation period is allowed.
What You Will Need
From the My Deck shop:
Composite decking boards in your chosen colour
T (plastic) Clip and Screw fixings for hidden fixing between boards
316 Stainless Steel Decking Screws for face fixing starter and perimeter boards
Joist Protection tape to protect timber joists from moisture
165mm Plunge Saw Blade for clean, accurate cuts with a track saw
Jigsaw Blades 5 Pack for curved cuts and tight angles
200mm long series drill bit for clean and effecient bolt connections
Masonry drill bit for pole plate connection
Other tools and materials:
Tape measure, string line, and chalk line
Track saw with composite-rated blade
Drill driver
Rubber mallet
Safety glasses and hearing protection
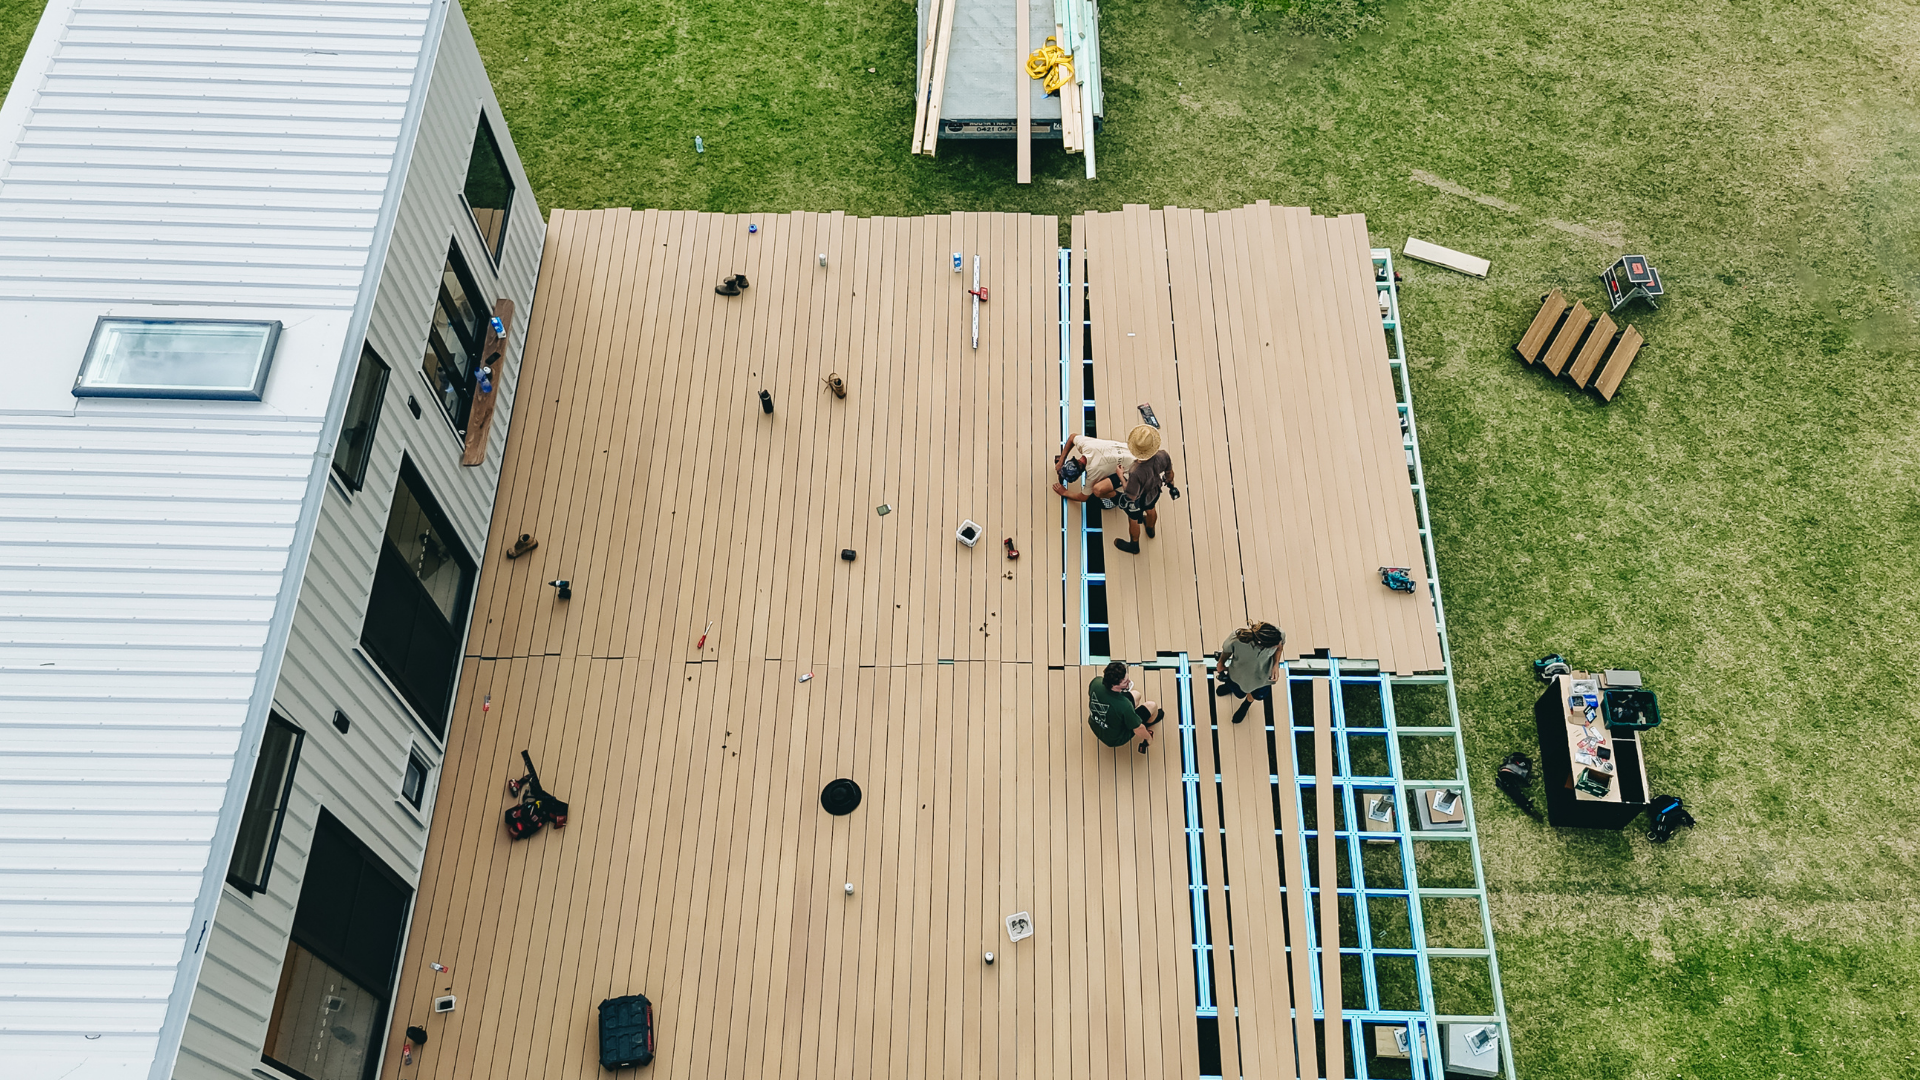
Step 1: Build a Solid Subframe
The subframe is the foundation of your deck. A poorly built subframe is the single most common cause of composite deck problems. Squeaking boards, movement underfoot, and premature board failure all trace back to the frame.
Joist spacing
For composite decking installed in a standard straight lay, maximum joist spacing is 450mm centres. For diagonal or 45-degree angle installations, reduce joist spacing to 300mm centres to maintain adequate support. For pool surrounds and commercial foot traffic, 300mm centres is also the recommended maximum.
Never exceed the maximum joist span for composite boards. Unlike timber, composite boards do not have the same structural rigidity and will flex and bounce perceptibly underfoot if joists are too far apart. This is one of the most common mistakes on DIY installs and one of the most difficult to fix after the fact.
Timber treatment
Use H4-treated pine or hardwood joists for decks within 150mm above the ground in Queensland. H5 treatment is the minimum standard for any timber in contact with or close to the ground.
Alternative to timber framing would be ‘Click Deck’ Aluminium frame, which eliminates the need for timber treatment entirely and is particularly well suited to coastal and high-moisture environments.
Apply joist protection tape
Before laying any boards, apply My Deck Joist Protection tape across the top face of every joist. This tape creates a barrier between the timber and the composite board, preventing moisture transfer, reducing noise from board movement, and extending the life of the subframe beneath. This step is commonly skipped on budget installations and is one of the leading causes of failure in composite decks that were otherwise correctly installed.
Check for level
Use a string line and level to confirm all joists sit on the same plane before proceeding. Any variation will be visible in the finished deck surface. Pack low joists with structural plastic packers until the frame is consistent. Time spent on a level frame saves significant rework later.
Step 2: Plan Your Board Layout
Before fixing a single board, plan the layout carefully.
Lay boards parallel to the longest wall or along the primary path of travel. Running boards parallel to the house makes the area feel wider and hides the gaps between boards from your main line of sight. Think about where you’ll sit or view the deck most often, and orient the boards so you aren’t staring straight down the board lines.
Mark a chalk line down the centre of the deck if your board run is long. This helps confirm boards are not drifting out of alignment as you work across the frame, which is particularly important on wider decks where small errors compound over many board widths.
Allow a minimum 5 to 10mm gap between the deck edge and any fixed structure such as a wall, post, or fascia. This gap allows for thermal expansion, which is significant in Queensland conditions, and ensures adequate drainage at the perimeter.
Step 3: Install the Starter Board
The first board sets the direction and alignment for everything that follows. Take time to get this right.
Position the starter board along the straightest edge of the deck and confirm it is square to your reference edge using a string line. Any deviation at this point will compound across subsequent boards.
Face fix the starter board using two matching coloured head screws per joist, pre-drilled before installing the screw. Continue using the Pinch and T-clip fixings once installation continues.
Step 4: Fix Boards with Hidden Clips
With the starter board in place, insert T-clip fixings into the groove of the board at each joist. Pick one joist in the middle of the decking board and install the pinch clip. Only one pinch clip is required per board, this clip locks the board in position while the T clips allow for expansion.
The next board then slots into the other side of the clip, locking it in place while maintaining a consistent gap between boards.
Side gap between boards
The T-clip fixing creates the correct gap between boards automatically when installed correctly. Do not force boards together or compress the clips. The gap maintained by the clip serves two purposes: it allows water to drain freely through the deck surface, and it allows the board to expand and contract with temperature changes without pressing against adjacent boards.
End gap at fixed structures
This gap must be set manually and is the most commonly missed step in DIY installations. Allow a minimum 5 to 10mm gap wherever a board end meets a fixed structure, including walls, posts, fascia boards, and step risers. In Queensland, where composite board surfaces can reach 60 degrees Celsius in direct summer sun, a board can expand up to 5.4mm over a 5.4m length.
Step 5: Cut Boards to Length
For the cleanest and most professional result, we recommend cutting all board ends at the same time using a track saw rather than cutting each board individually as you go. This ensures all ends are perfectly aligned, eliminates accumulated measurement error, and produces a consistent clean edge across the full width of the deck in a single pass.
Set the track saw guide along the finished edge line and run all boards through together.
The 165mm Plunge Saw Blade is designed for clean cuts through composite material. Use a fine-tooth blade and maintain a consistent feed rate. Forcing the cut produces a rough edge and can cause chipping on the board surface.
For curved cuts around posts or obstacles, use Jigsaw Blades with a fine-tooth setting. Mark the cut line clearly before cutting and cut slightly wider than the post to allow for expansion around the fixing point.
Unlike timber, composite decking requires no sanding, no oiling, and no re-staining. A wash with soap and water a couple of times a year is all it takes to keep it looking great. In the Sunshine Coast’s climate, composite boards are engineered to resist UV fading, moisture, mould, and the salt air that takes such a toll on timber.
The ongoing maintenance cost of composite decking is a fraction of what timber demands, and the performance holds up significantly better in coastal conditions.
On the Sunshine Coast, the combination of summer storms, humidity, and UV means you should stay on top of these intervals, particularly the annual oiling and re-staining cycle, rather than letting it slide.
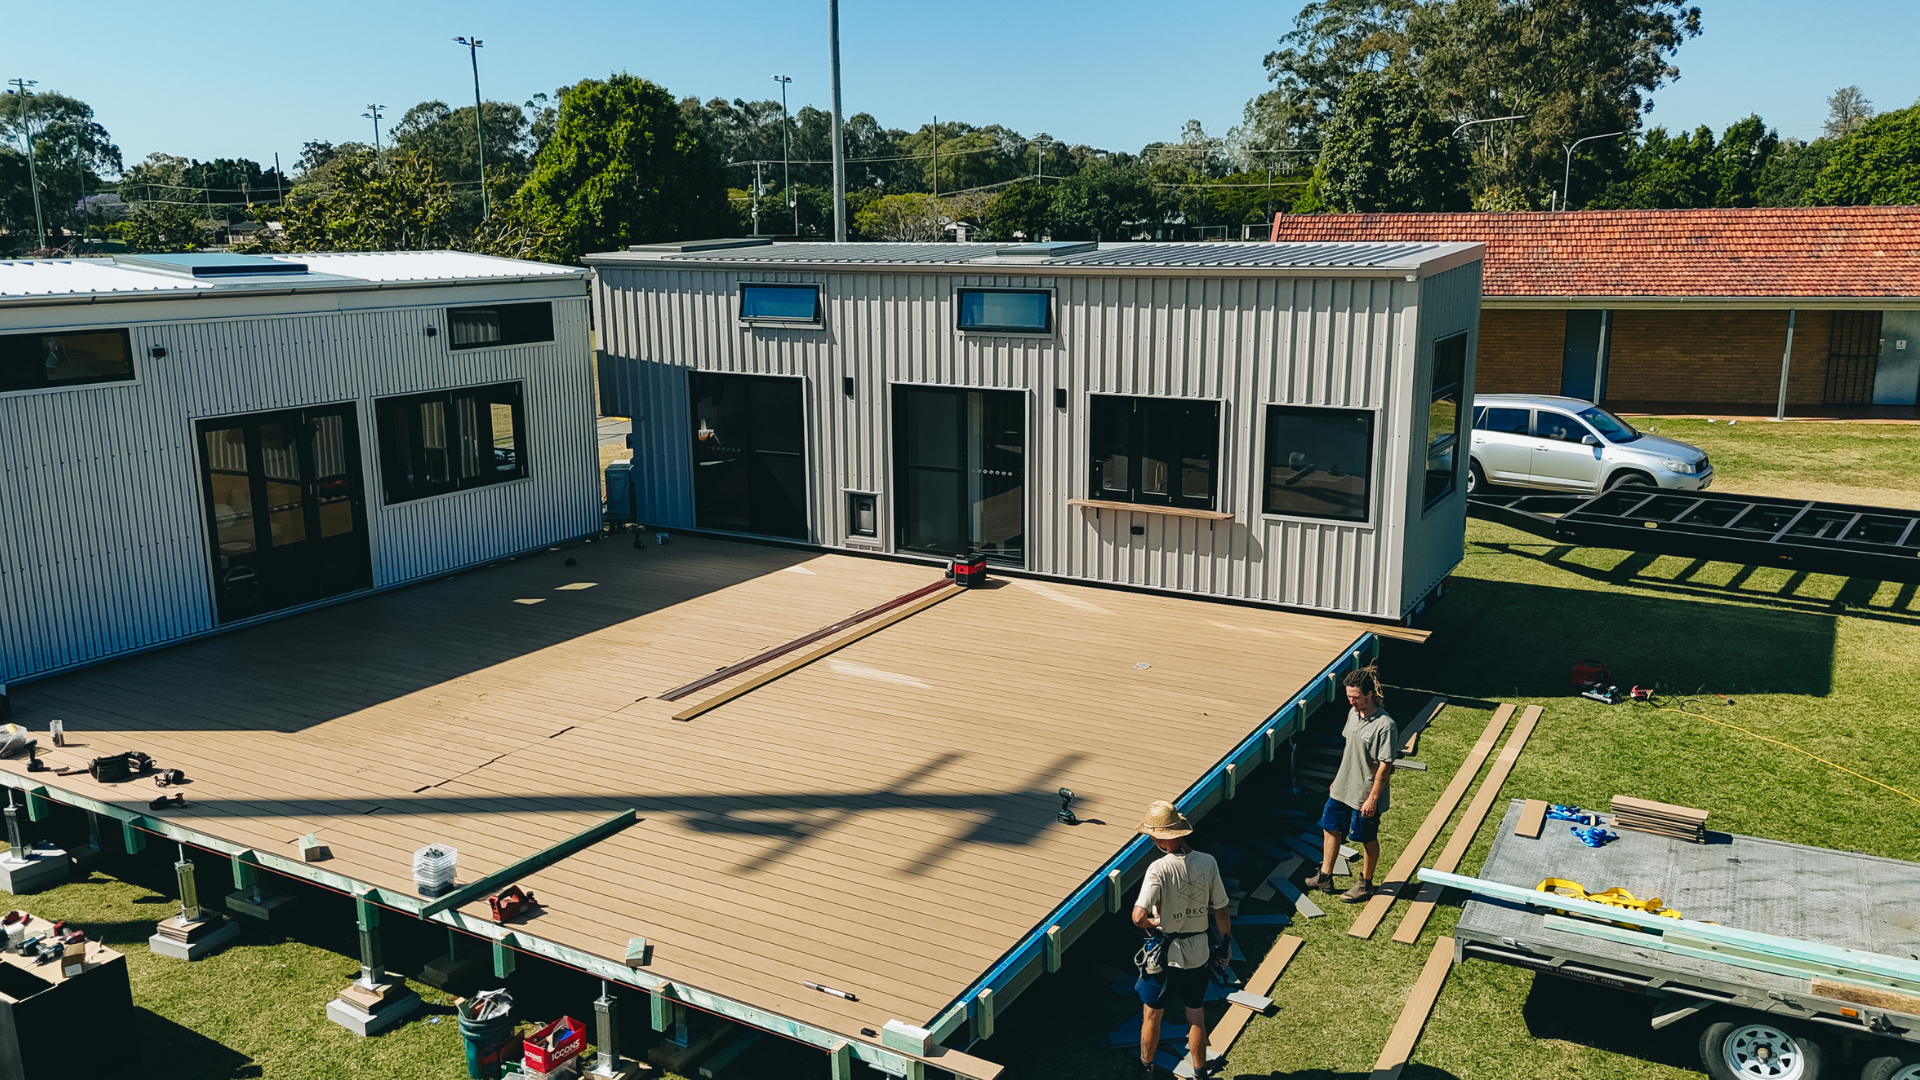
Step 6: Install the Finishing Board
The final board at the perimeter is face fixed in the same way as the starter board. Two coloured head screws per joist, pre-drilled and driven flush. This board locks the deck in from both sides.
For a clean finish at exposed edges, use My Deck Edge Boards to cap the ends of the decking boards. Edge boards are available in all My Deck colours and give a polished, professional finish to the perimeter of any deck.
Step 7: Final Check and Clean
Confirm that expansion gaps are consistent at all fixed structures around the perimeter. Remove any construction debris from between boards and flush the deck surface with water to remove cutting dust.
Composite decking does not require any sealing, oiling, or surface treatment. It is ready to use immediately after installation.
Common Installation Mistakes to Avoid
Joists spaced too far apart Exceeding the 450mm maximum joist spacing for a straight lay causes flex, bounce, and noise underfoot. Diagonal installations require 300mm centres. Always confirm joist spacing before laying boards.
No joist protection tape Skipping the joist tape allows moisture to collect between the joist and board, leading to squeaking and accelerated timber decay beneath the deck. This is one of the lowest-cost steps in the installation and one of the highest-impact ones.
Insufficient end gaps Composite boards expand along their length in heat. Gaps that are too tight at board ends will cause buckling in summer, particularly in Queensland where deck surface temperatures regularly reach 60 degrees Celsius. Allow 5 to 10mm at all fixed structures.
Wrong screw grade Mild steel and standard zinc-plated screws corrode rapidly in coastal conditions. Use 316-grade stainless steel throughout. The rust staining from incorrect screws is permanent.
Cutting boards one at a time Cutting individual boards introduces measurement errors that accumulate across the deck, leaving an inconsistent finished edge. Use a track saw and cut all ends in a single pass for a professional result.
Existing frames spaced at 450mm or 600mm centres If replacing >30mm timber decking on an existing frame, check joist spacing before ordering composite boards. Adding intermediate joists is straightforward and avoids board flex and warranty issues later.
Installation Checklist
Joist spacing at maximum 450mm centres for straight lay, 300mm for diagonal
H4 or H5 treated timber subframe
Frame confirmed level before board installation
Joist protection tape applied to all joists
5 to 10mm minimum gap to fixed structures at board ends and sides
T-clip hidden fixings at every joist, not skipping any
200mm long series drill bit for clean and effecient bolt connections
All face fix holes pre-drilled before driving screws
All ends cut at the same time using a track saw
Edge boards fitted to all exposed perimeter edges
Consistent gaps confirmed at all fixed structures before completion
Coloured head screw